Thursday, September 27, 2012

PAINT! Little cost, HUGE impact

This a short post but a GOOD one.

As most of you know, I am a HUGE fan of paint. I think it is the best and most inexpensive way to make a BIG impact in your home! There are so many great products out there in the “paint market” that really allow you to get creative and do many different techniques! Here a few to get your creative juices flowing for your home!

Focal Point


Painted Ceilings  

 Dark is great for higher ceilings to make it feel more intimate ie. Dining Rooms

 Great to add a pop of color to a more neutral space

Painted Floors

Dramatic Diagonal Stripes

Neutral Harlequin

Bold Pop of Color

 Metallic Paint

Give the illusion of Porcelain Tile

 Adds a great surface for a fabulous chandelier to reflect off of

Stencils

Chevron

 LOVE this- A flat paint on wall and a high glass paint in the SAME color! Such a dramatic "Wallpaper" look

 Stripes- VERY close to my heart. I use this technique often

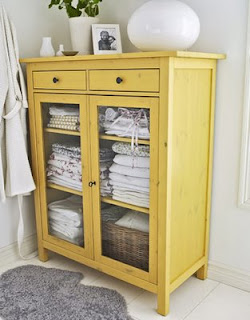
Painted Furniture

 Great to add a splash of a color to a room.

Painted Trim

Switches it up a little and adds a nice "outline" to your room

c2

STAY CONNECTED
 

Tuesday, September 25, 2012

25 Small Space Design Tips


We all have small spaces in our homes, apartments or condos. Whether it is a walk in closet that you can't seem to get right, or your living room in an apartment or condo that just will not hold everything you need it to!

 I have compiled a list of my favorite design tips that I use in my house and my clients homes’ as well to save space, stay organized, and LOOK FABULOUS!!!

1.  If you have a small space, use smaller furniture so your space appears bigger!

2. As hard as it might be...KEEP IT CLEAN!

3. Get rid of Clutter- the more you have the more space it takes up!

4. Duel Purpose! - Find pieces that can have multiple uses. An ottoman is comfy, but also makes for great hidden storage. A sofa table is a great surface area but also makes a fantastic desk.

BEFORE: A clients' home with TONS of toys everywhere
 AFTER: All the toys tucked into a large storage ottoman

 Sofa Table/Desk

5. Furniture with legs feels less heavy in a space, than pieces that sit directly on the floor. I call this “NEGATIVE SPACE”

6. Go Vertical and use all the space that you can- shelves and storage have a small footprint but are great for small spaces.

7. Glass-front bookcases for some reason “feel” less cluttered if they are behind glass. All of your “stuff” looks like art if it is on display!

8.  Create a focal point! Use, a piece of art, an accent wall, or a great mirror to create a point of interest that is noticeable when you first enter the space.

9. On those same lines, use color as an accent wall! If you paint just one wall in your space it creates depth and perspective, and gives the illusion that your room reseeds further than it does. I do this A LOT in my designs!
 Clients' Home: Red colored accent wall!

10. Don’t be afraid of color in a small space. Yes white makes a room look bigger, but so does a dark brown glossy color when paired with the right color furnishings.
 Small Powder Room in DARK Navy

11. Don’t try to furnish it all at once, on your own. Start with the most important pieces (bed, sofa, etc.) and live with it for a while before you start adding. You don’t want to over furnish!

12. Arrange the space so it meets your needs for the way YOU use it….not how you think it should be used! If you eat in the living room, get a larger coffee table and not a large dining table.

13. Put your money in the areas that you spend the most time!

14. Don’t go crazy when going out to purchase furniture. Make a list of things you NEED at the time and not what you want. It may turn out that you don’t have space for the things you WANT!

15. Think of your furniture as being mobile and multipurpose. Choose pieces that are easy to pick up and move for different purposed. My favorite example of this is my garden stool. I use it as a side table most days, but if we have people over, I move it and use it as another seat for guests! 

16.Edit, Edit, Edit! Look at everything with a critical eye. If you have a chair that you don’t love and don’t sit in, get rid of it and find one that you do love or something to take its place that is better for your lifestyle.

17. If you don’t have room for a dresser, get a storage bed!

18. Consider furniture that blend visually with your floors and walls. This way it will be transparent not grab your eye and look like it is taking over the space.

19. Use MIRRORS in your space. Mirrors give the illusion of more space, and they reflect light to make your space brighter!

20. Add as much light into your space as you can! Use lamps where you do not have overhead lighting!

21. A dark floor against light colored wall and furniture can really make a place feel more spacious.

22. Invest in a closet system. You would be surprised how organized it can keep you if everything has a place…not on the floor!

23. Try to avoid taking up floor-space. Instead of a bookcase, use bookshelves mounted to the wall.

24. Combine loves with needs

25. There are NO RULES! Have fun and love where you live!

c2

Stay Connected
Website
Facebook
Twitter


Thursday, September 20, 2012

Trick to creating your GALLERY WALL

Trick to creating your GALLERY WALL!

I am sure many of you, like myself, have those large black walls that you just don’t know what to do with. As you tear interior design magazines and are “pinning” like crazy trying to figure it out, I am sure you have seen the very lovely and chic trend of “gallery walls”. This is simply a collection of prints, pictures, accessories and framed items that you collage together. 

I love the effect of filling an empty wall with a medley of photographs and pieces of artwork that have special meaning. There’s something lovely about arranging things into a perfectly masterminded yet haphazard cluster. A perfect mess, if you will. While the final look appears casual and uncalculated, there is actually a method to the madness. Creating a wall gallery is no easy feat. That’s why I’ve put together this guide to teach you how to hang a wall collage with finesse.
 I not only have used this technique in my house but also for many of my clients. It is the prefect solution to fill those large bank walls and highlight all of those pieces that “have not found their place” on your walls!


1. Decided what you want to hang~
  • Mixing the same medium is usually easiest—photographs, black and white prints, colorful artwork etc. 
  • The pieces can either be the same size or varied.
  • If you don’t want to spend a fortune on frames, go to your local flea market and pick some up. If they don’t match, simply paint them a uniform color. 
  • You don’t have to spend a fortune to fill the frames either. You can use scraps of leftover wallpaper, old photos, pages from a vintage book or even leave them empty. Or use your favorite personal photos—it’s a great way to add a touch of warmth and personality to your space.
*NOTE: Typically if I set out to purchase all new frames to fill, I like to get 3 different sizes (4x6, 5x7, 8x10) and an odd number of each. You would be surprised how odd numbers create the perfect puzzle on your wall.


2. Next, plan it~ Before you start nailing holes into the wall.
  • Lay out all of your pictures out on the floor in front of the wall, or in an open space.
  • Groupings look most cohesive when frames are spaced tightly together (about 1 to 2 inches). However, if there is an extra large piece in the mix, give it a little extra room to breathe like an 1nch or so. 
  • Start with the biggest pieces first and then work around them if you are mixing sizes.
Here are some different configurations. I find that sometimes just playing around with it, sometimes works better than being calculated.

3. Create Templates~
  • Use butcher paper or newspaper to trace out all of your collage pieces.


4. Test it~
·         Just because the collage looks good on the floor doesn’t mean it will work on the wall.
·         Transfer your paper collage (your paper cutouts) using tape, to the wall. If something doesn’t look write, simple move them around until it does.
·         Frames should hang at eyelevel or around 5 feet. If you’re exceptionally tall or have very high ceilings, you can hang them a tad higher.

5. Hang it~ Create your masterpiece.
·         Keep your paper up on the wall and measure where you your hangers should go buy measuring how far the hang down on the actual frame
·         Once you feel confident, start hammering away, and replace the paper with your frames.
·         Make sure to pull off the paper from the wall- silly but you would be surprised!


Here are just a few that I have done for my clients
You will notice that I was missing a frame and still have my template in it's place on the far left hand side :)
This client has a lot "word art" that she wanted to showcase in one place
There you have it! Your very own picture gallery!

Happy Hanging!
c2

Stay Connected With Us:
Website
Facebook
Twitter
Pinterest


I got MARRIED!


So sorry for being MIA for almost a year...totally un acceptable, but I swear I have a legitimate excuse :)

In July I married the man of my dreams and celebrated with a wedding that I am truly proud of! Despite working with a great Wedding Panner, I planned most of the details and customized it all with a specialized logo that I designed. Every detail had our wedding logo on it, and my husband, asked if we were really getting married or starting a business?!ha
 It was SERIOUS Branding!

For the colors, people thought I was crazy, but I chose white and khaki to be the base colors with pops of RED, TANGERINE, and TEAL. Told you it sounded crazy. There is a method to my madness in that I wanted it to be neutral with big, bold pops of color that were fresh and summery. It just so happened that I was up on my Pantone colors, because this combination was featured as the summer's hot colors! WOO HOO!

I also chose the quatrafoil patten,because being a designer, I needed to add some pattern and texture to the whole mix as well!

Take a look!!

Save the Dates

Folio Invitation

 Hotel Bags for Guests


Schedule I designed for guests with Pictures:)

IT'S ALL IN THE DETAILS!!

Custom Water Bottles

Shutter with Escort Cards


 Family Tree/ Centerpieces


Custom Corn-hole Game for Cocktail Hour


 "Love is Sweet" Cake-pop Favors

Reception Tent


Photobooth!


c2